
Why the add listing form matters so much
A directory site usually asks users for a lot of information.
That can include:
- title and description
- categories and locations
- contact details
- features, labels, and tags
- images and gallery uploads
- custom fields
- work hours or availability
- pricing details
- package-related or ownership-related steps, depending on the site model
If the form asks for the wrong information, asks too much too early, or presents everything without structure, users often abandon the process or submit lower-quality listings.
That is why the best add listing form is not the one with the most fields.
It is the one that collects the right information with the least confusion.
Start with one simple mental model
If you only remember one thing, remember this:
- the listing structure decides what information the site needs
- the add listing form decides how users provide that information
- the single listing page decides how that information is shown later
That means the form should follow the structure, not invent it.
If your categories, locations, custom fields, and taxonomies are not clear yet, the add listing form usually becomes harder to design well. That is why it helps to settle the structure first in How to Build Your Directory Structure Before Designing Anything in Listdom.
Where the add listing form is managed
The main settings path is:
Listdom → Settings → Frontend Dashboard
Inside that area, the add listing form is mainly shaped through:
- Add Listing → General
- Add Listing → Guest Submission
- Add Listing → Fields
- Add Listing → Restrictions
- Dashboard Menus
These are the main places to review before trying to refine the user experience. You can check the Listdom frontend dashboard documentation to have a detailed explanation of all available options
The two main ways the add listing form can appear
This is one of the most important beginner concepts.
Listdom supports two practical submission paths.
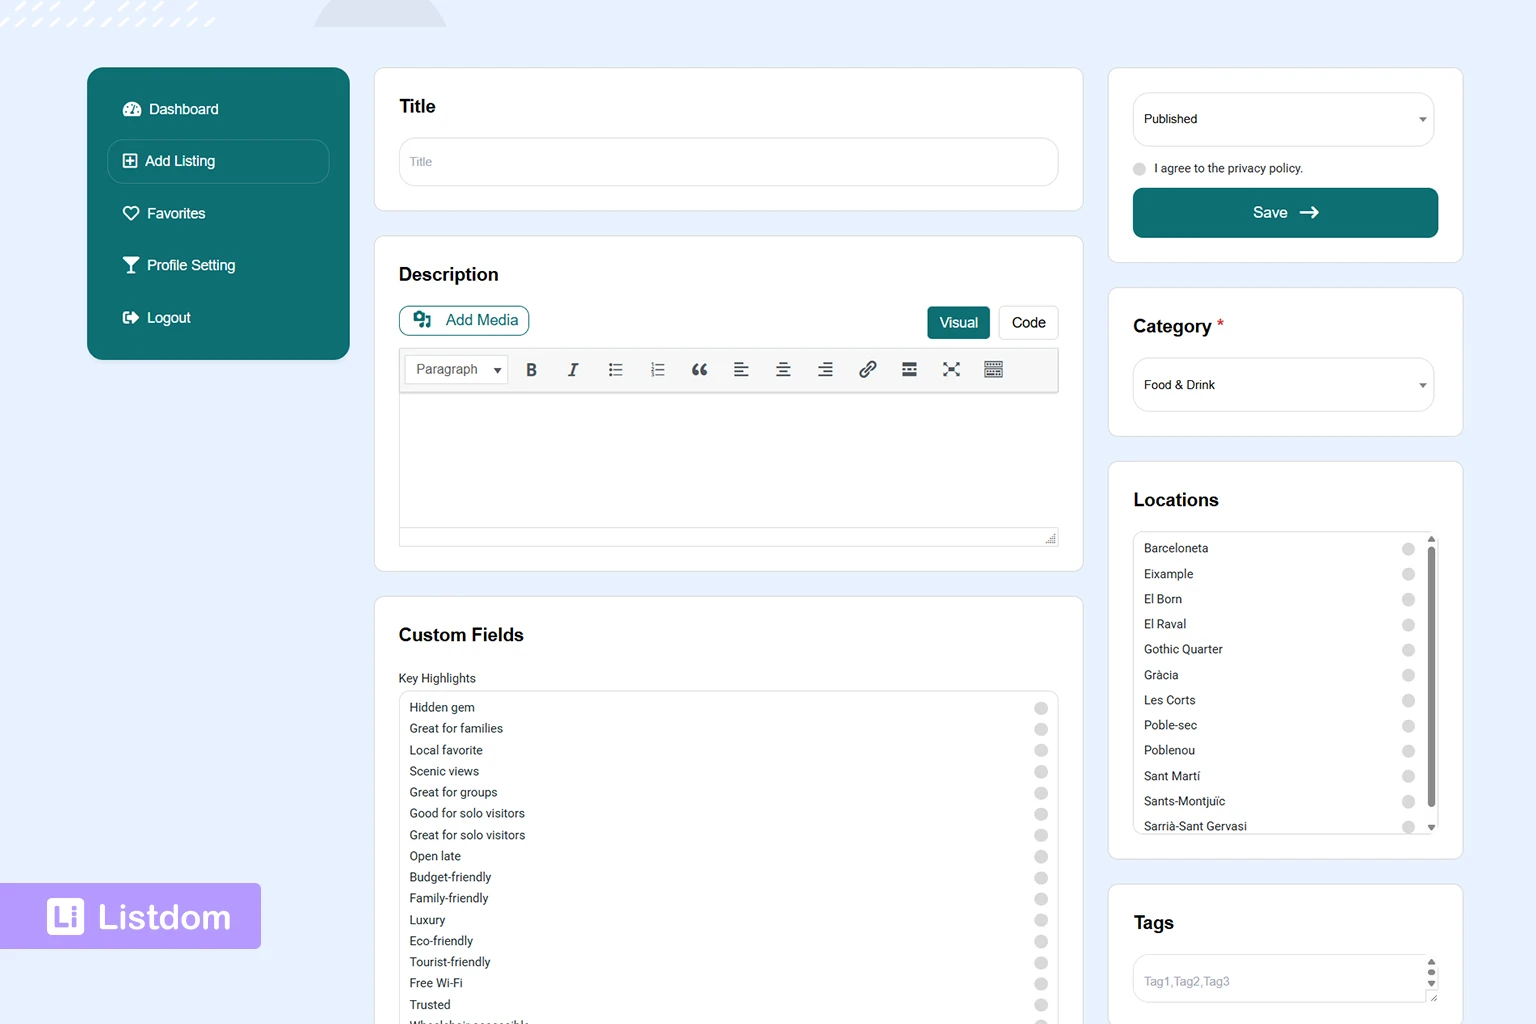
1. Inside the Frontend Dashboard
This is the standard integrated workflow.
Users enter the dashboard, click Add Listing, and the form appears as part of the dashboard experience.
This works well when:
- the dashboard is the main user hub
- users will return later to edit listings
- memberships, bookings, applications, or other user-side features are part of the project
2. On a separate standalone page
Listdom also supports an independent add listing page.
The practical path is:
- Create a WordPress page
- Insert the shortcode
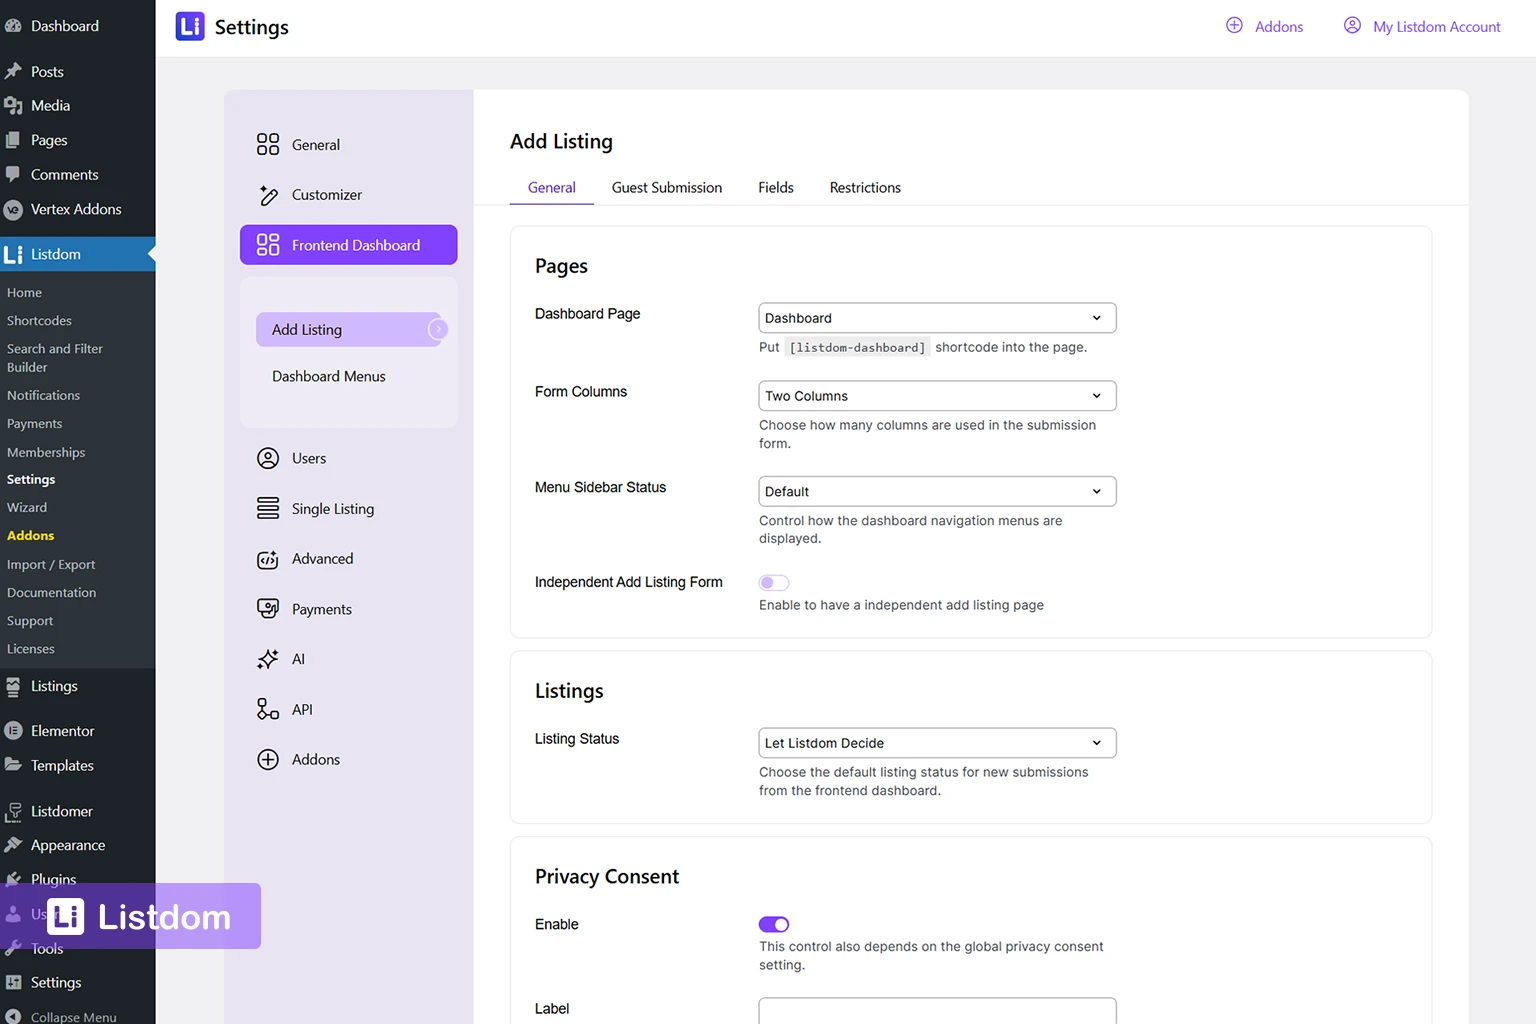
[listdom-add-listing] - Go to Listdom → Settings → Frontend Dashboard → Add Listing → General → Pages
- Enable Independent Add Listing Form
- Select that page as the Add Listing Page
This is useful when you want a cleaner, more direct submission flow that does not require users to enter the full dashboard first.
How to set up the add listing form in the right order
A practical setup order looks like this:
Step 1: Make sure the listing structure is ready first
Before refining the form, make sure the site already knows:
- what categories exist
- what locations exist
- which custom fields matter
- which features, labels, or tags should be assignable
If that structure is still vague, the form usually becomes messy too.
Step 2: Decide whether submission should happen inside the dashboard or on a separate page
Go to:
Listdom → Settings → Frontend Dashboard → Add Listing → General → Pages
Then decide:
- should users submit from the main dashboard page?
- or should they use a dedicated add listing page?
If you want the dashboard route, make sure the Dashboard Page is assigned to a page containing [listdom-dashboard].
If you want the standalone route, enable Independent Add Listing Form and assign the page containing [listdom-add-listing].
Step 3: Decide what happens for guests
Go to:
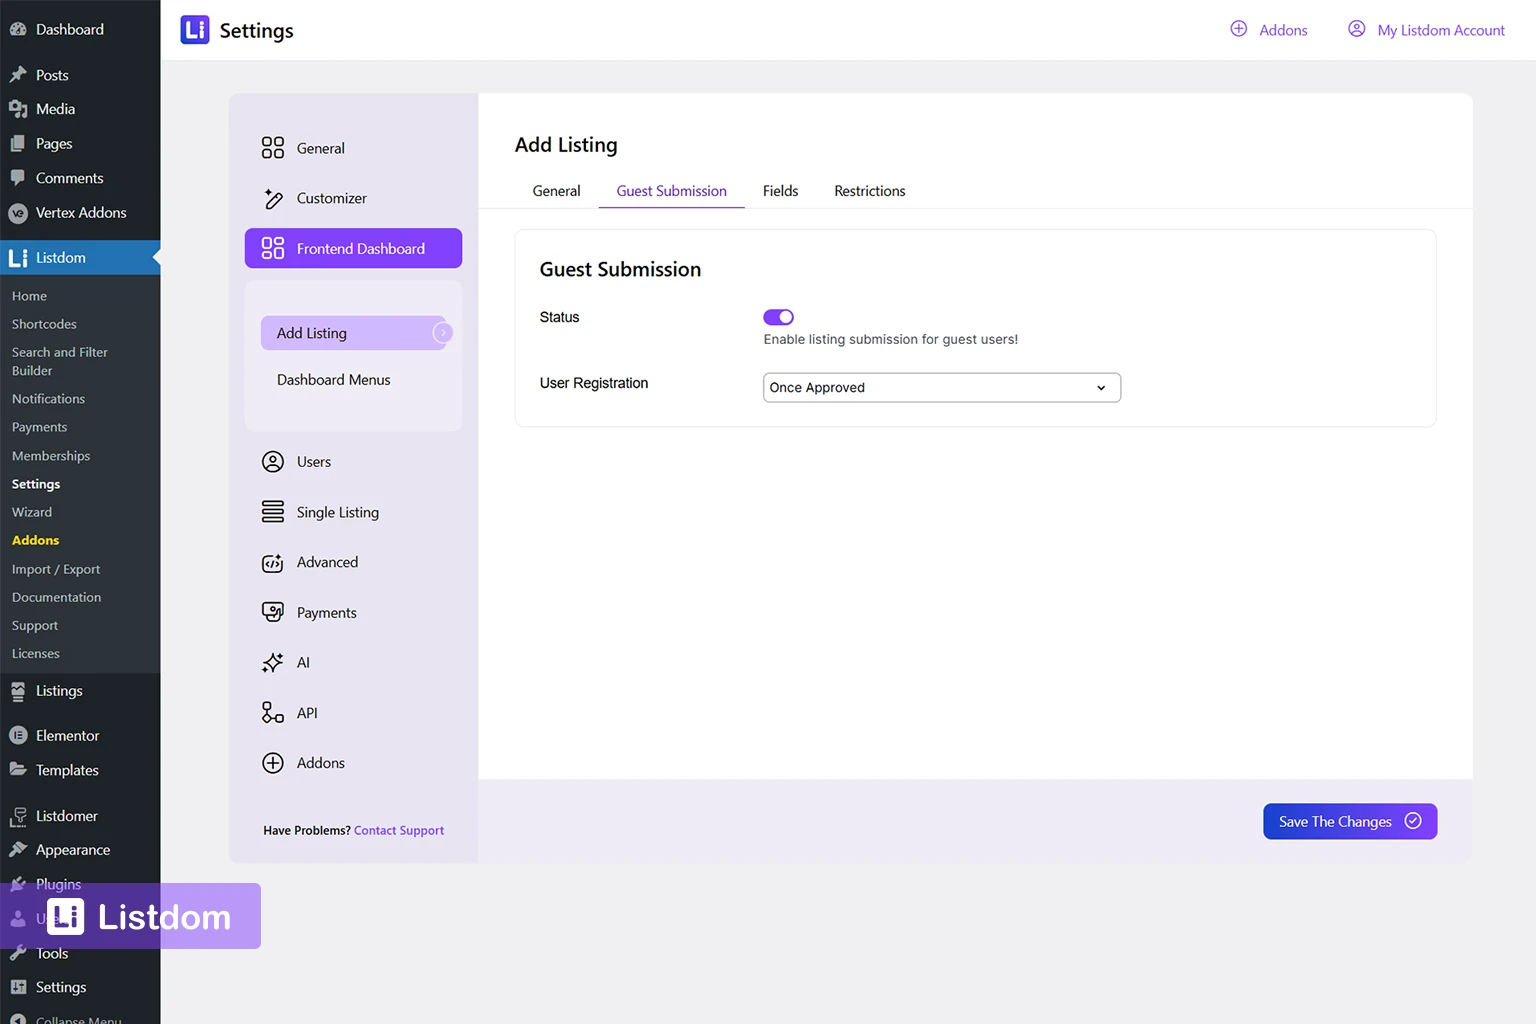
Listdom → Settings → Frontend Dashboard → Add Listing → Guest Submission
This is where you decide whether users can start the submission without logging in first and what kind of registration behavior should happen around that flow. If you want the broader user-access side explained first, see How Listdom Login, Registration, and Access Flow Work.
This matters because the form experience changes a lot depending on whether:
- guests are allowed
- users must authenticate first
- package selection or membership logic comes before submission
Step 4: Review the form fields and modules
Go to:
Listdom → Settings → Frontend Dashboard → Add Listing → Fields
and also review any module-related controls in the Frontend Dashboard settings.
This is where you shape what users actually see on the form.
Depending on your setup, the form can include things like:
- title and description
- categories, locations, labels, features, and tags
- contact information
- price fields
- gallery and featured image
- embed codes
- work hours or availability
- custom fields
- remarks or other optional modules
The available fields depend on the enabled modules and the active feature stack. If you are deciding what belongs in those modules, it also helps to review How Labels, Features, and Tags Work in Listdom and How Listings, Categories, and Locations Work in Listdom.
Step 5: Decide which fields should be required
Go to:
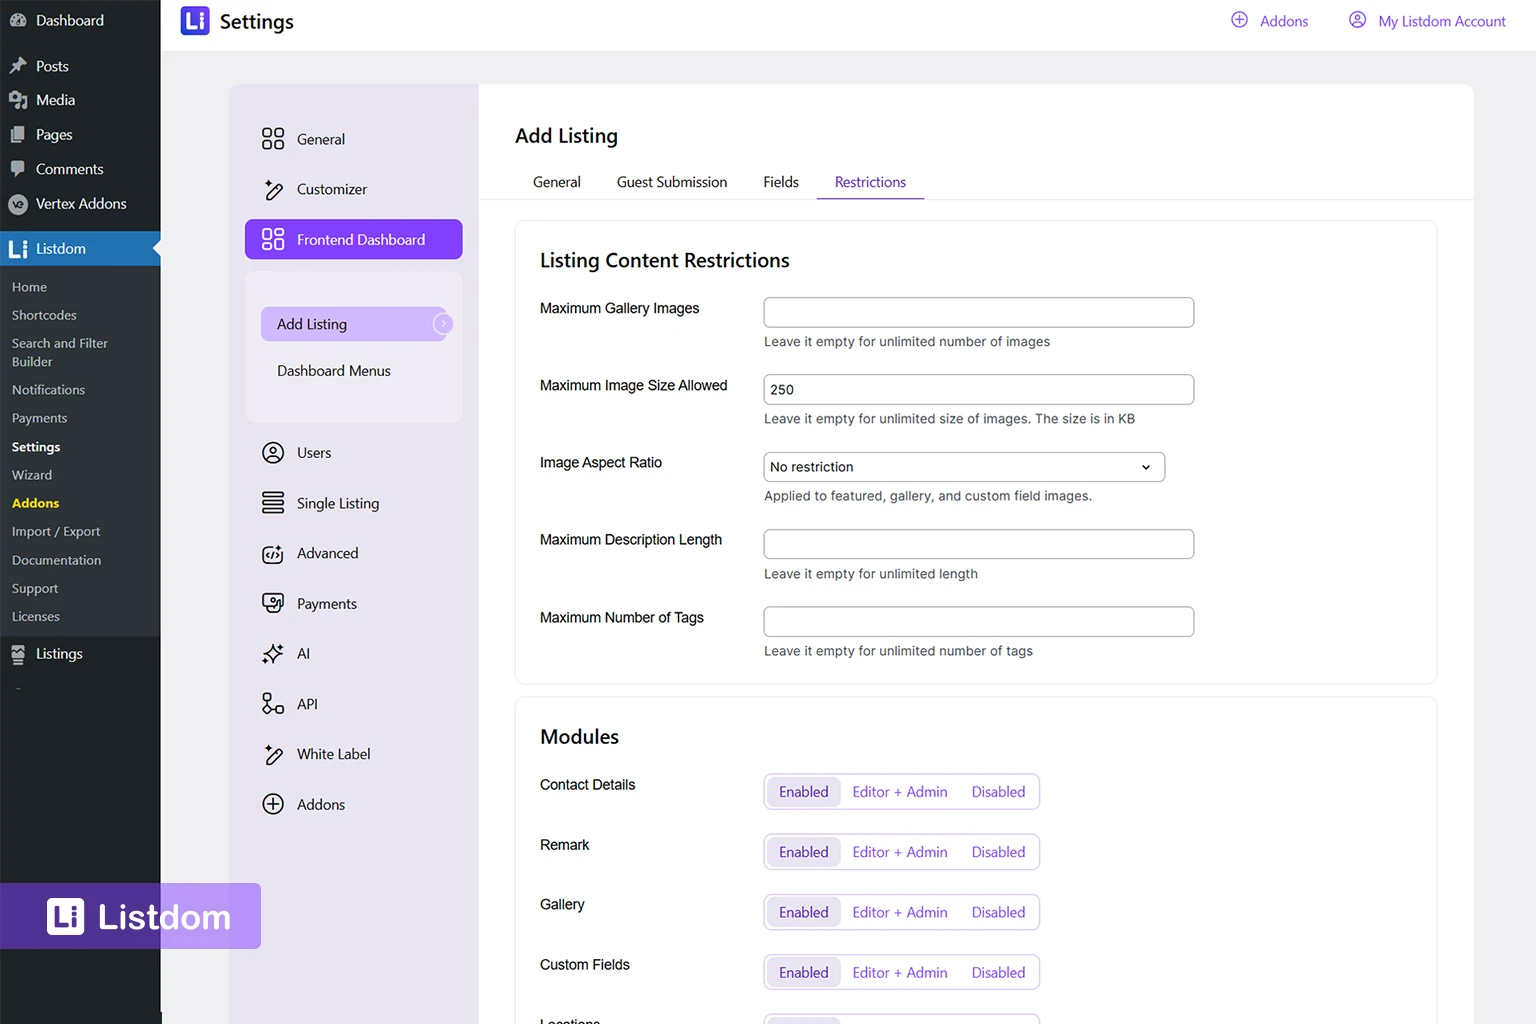
Listdom → Settings → Frontend Dashboard → Add Listing → Restrictions
and the related required-field controls.
A good rule is to make a field required only when the listing truly becomes low quality without it.
If you require too much, users drop off. If you require too little, data quality suffers.
Step 6: Test the full flow with a normal user account
Do not test only as admin.
Use a regular account and actually submit a listing.
That is the fastest way to see whether the form feels clear or heavy in real life.
What the best add listing form looks like in practice
The best add listing form usually has these qualities:
- it asks only for the information the site really needs
- it matches the structure of the directory
- it does not overload users with low-value fields
- it makes important fields obvious
- it removes or hides modules that are not part of the real business model
- it feels consistent with the final single listing page
A strong form is not built by turning everything on.
It is built by making better decisions about what to leave out.
Which fields should usually come first
In most cases, users understand these fields quickly:
- listing title
- category
- location
- short description or main description
- basic contact details
These usually form the easiest first layer of the submission experience.
After that, you can add more specific elements such as:
- features
- custom fields
- gallery
- work hours
- labels
- tags
- price-related information
That order usually feels more natural than showing every advanced field at once.
How to decide what should not be on the form
This is where many good forms are won or lost.
Ask these questions:
- Does the user really know this information at submission time?
- Does the field improve the listing quality enough to justify the friction?
- Is this field better handled by admins later?
- Is this something only premium users should see?
- Is this element useful on the final listing page, or just theoretically available?
If the answer is weak, the field may not belong on the first version of the form.
How package rules and memberships can affect the form
If you use the Membership add-on, the add listing form may not behave the same way for every user.
A package can affect things like:
- whether the user can submit at all
- which modules are available
- how many tags are allowed
- whether labels are available
- whether the user reaches package selection before the form
That means a form can look “wrong” for one user and “normal” for another because the package layer is shaping the submission experience.
The practical place to check that layer is:
Listdom → Memberships
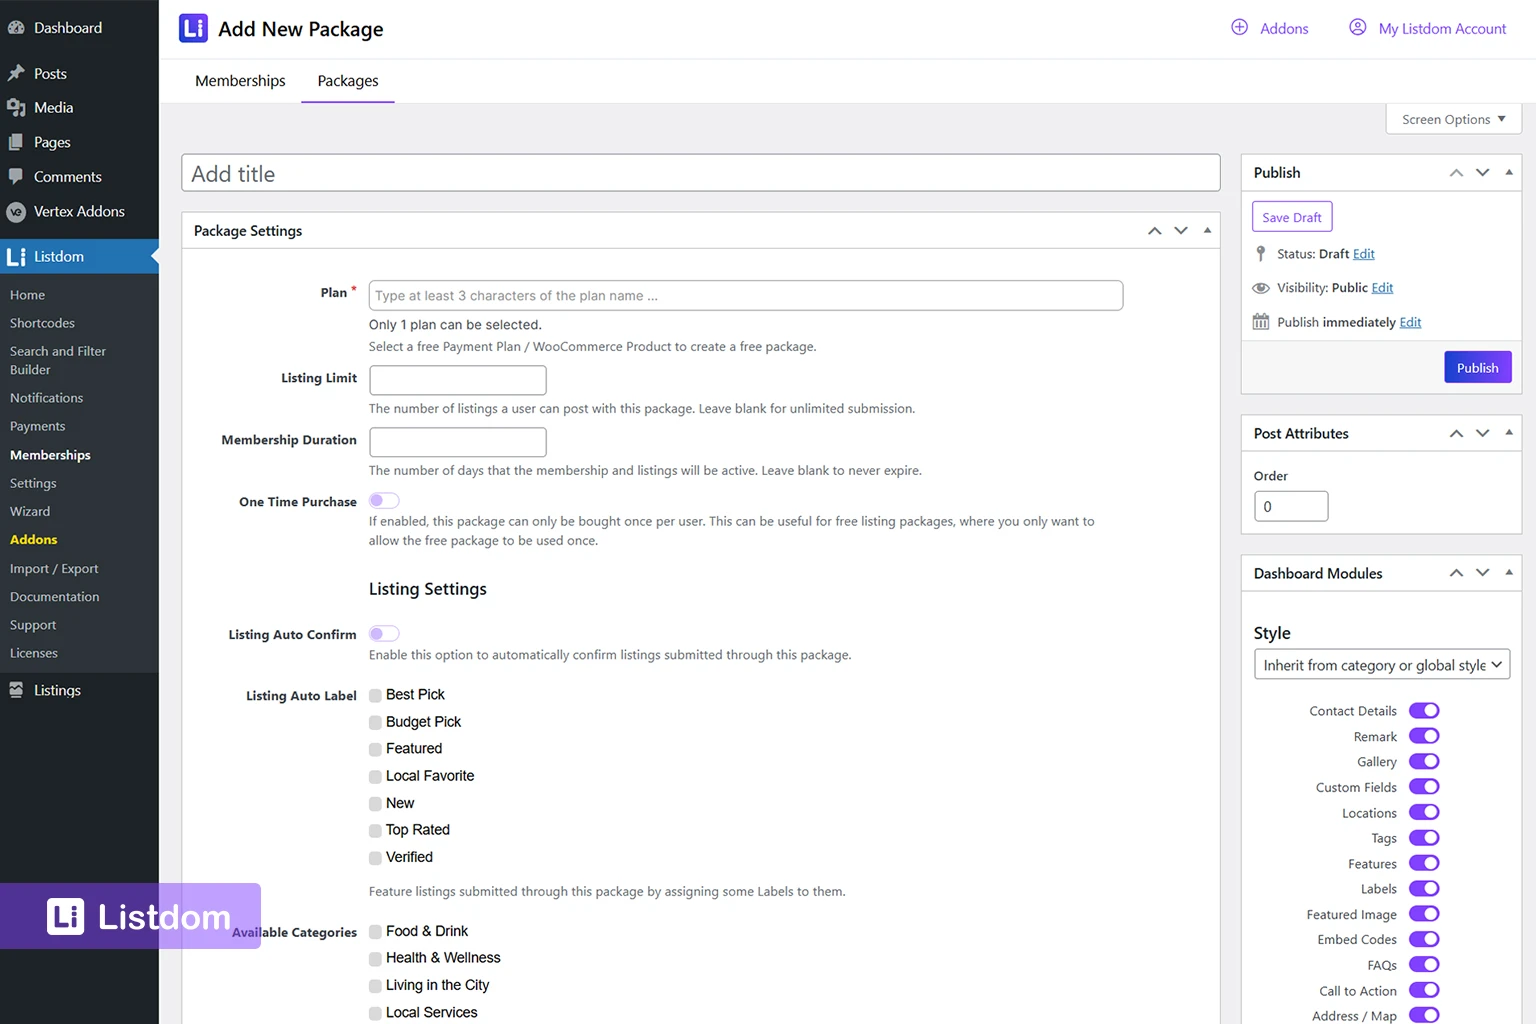
then edit the relevant package and review its dashboard modules, limits, and related controls. If the package layer is part of your project, How Listdom Membership Packages Work is the best companion article for understanding why different users may see different submission experiences.
How the add listing form connects to the single listing page
A useful way to refine the form is to look at the final output.
Ask:
- what should the final single listing page contain?
- which fields are important enough to deserve space there?
- which inputs are only clutter?
The form and the single listing page should support each other.
If the final page does not benefit from a field, that field may not belong in the form at all. For that reason, this article works very naturally with How Single Listing Pages Work in Listdom, because the best form usually reflects the page you want to end up with.
How custom fields affect the add listing form
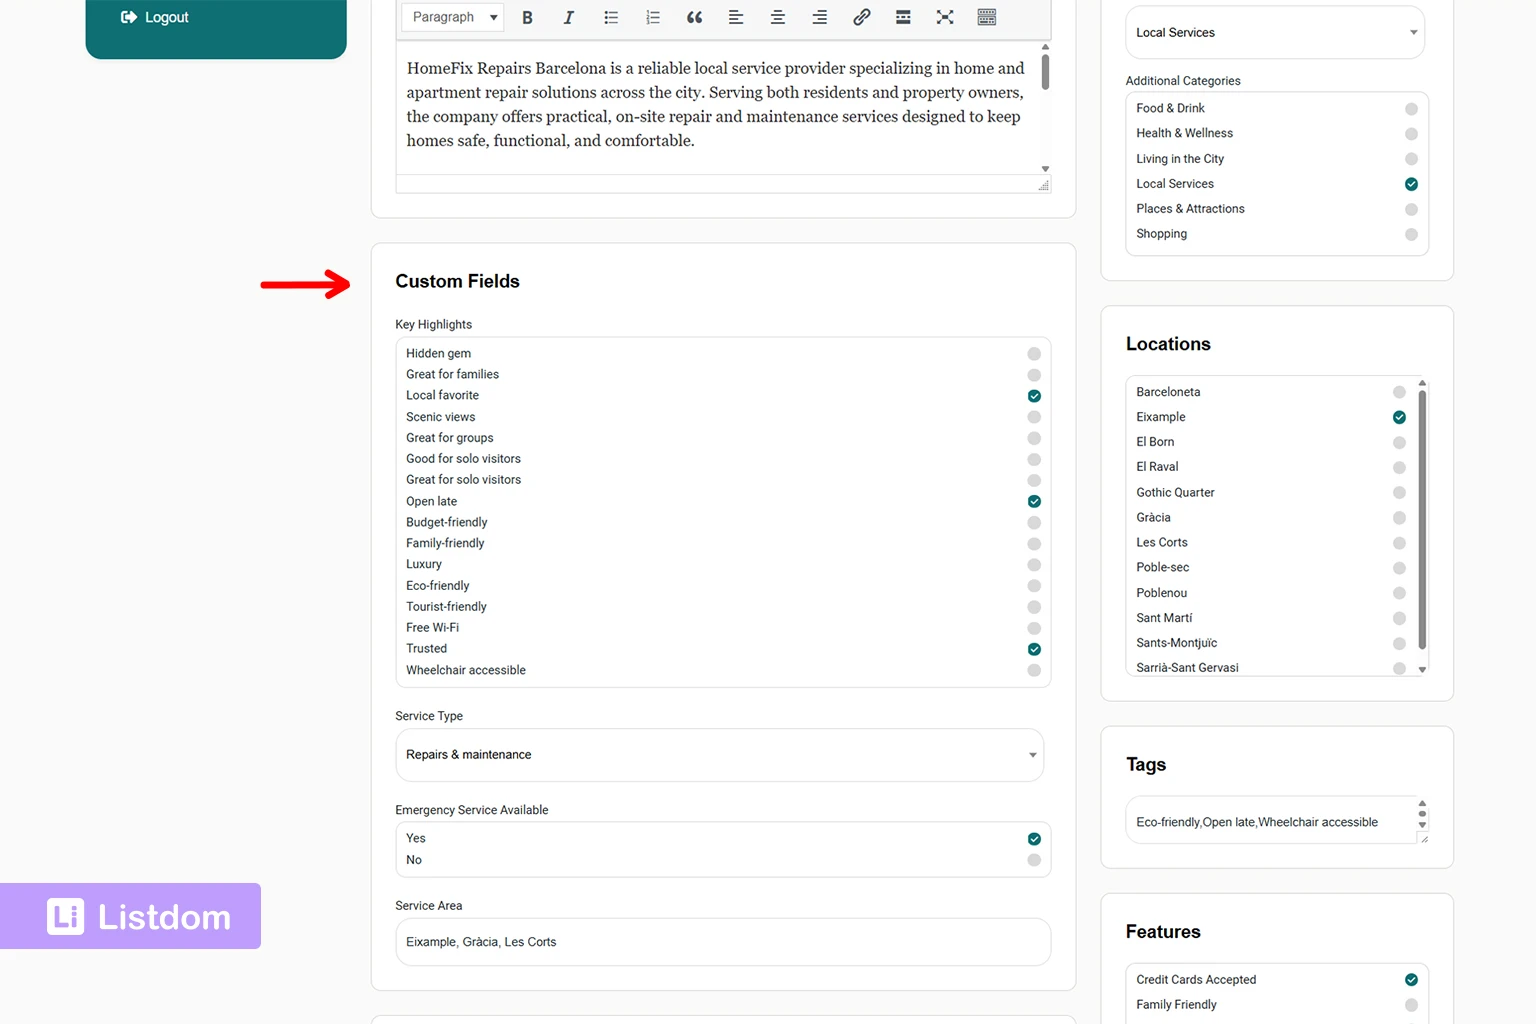
Custom fields can make the form much more useful, but they can also make it much heavier.
That is why the right question is not:
- how many custom fields can I add?
It is:
- which custom fields truly improve the listing model?
A good practical rule is:
- start with the custom fields that clearly support search, listing quality, or niche-specific detail
- leave lower-value fields for later if needed
If you want the full custom-field planning article, see How Custom Fields Work in Listdom.
How taxonomy terms affect the form

The add listing form can also include taxonomies such as:
- categories
- locations
- labels
- features
- tags
These should not all be treated the same way.
A simpler, clearer taxonomy design makes the form easier to use.
If users need help understanding what these mean, these companion articles matter:
- How Listings, Categories, and Locations Work in Listdom
- How Labels, Features, and Tags Work in Listdom
Common beginner mistakes
Starting with the form before the structure is clear
This usually creates a confusing submission experience.
Making too many fields required
Users should not feel like they are filling out an admin audit form.
Enabling every module just because it exists
Not every site needs every module.
Forgetting to test as a real user
Admin testing hides too much friction.
Using the same heavy form for every listing model
Some directory types need simpler forms than others.
Ignoring package-based differences
Packages can change what the user actually sees or can submit.
What to configure first
A practical beginner order looks like this:
- define the listing structure first
- choose dashboard-based or standalone add-listing flow
- assign the correct pages in Listdom → Settings → Frontend Dashboard → Add Listing → General → Pages
- decide guest-submission behavior
- review fields, modules, and required fields
- test with a real user account
- then refine the form for conversion and data quality
That order keeps the add listing form practical instead of chaotic.
What to learn next
Once the add listing form is clear, the best follow-up topics are:
- How the Listdom Frontend Dashboard Works
- How Listdom Login, Registration, and Access Flow Work
- How Custom Fields Work in Listdom
- How Single Listing Pages Work in Listdom
These topics help connect submission, access, structure, and final listing output.
Final thoughts
A good add listing form is not only a technical form.
It is part of the business model, the user experience, and the data quality strategy of your directory.
If you keep it aligned with the real structure of the site, the whole project becomes easier to manage.
If you overload it, the whole system becomes heavier than it needs to be.
That is why form design in Listdom is really structure design from the user’s point of view.
FAQ
Where do I configure the add listing form in Listdom?
Mainly in Listdom → Settings → Frontend Dashboard, especially inside the Add Listing settings and Dashboard Menus area.
Can I create a separate Add Listing page?
Yes. Enable Independent Add Listing Form, place [listdom-add-listing] on a WordPress page, and assign that page in the Frontend Dashboard settings.
Can the add listing form work inside the Frontend Dashboard too?
Yes. That is the standard integrated workflow through the dashboard page that uses [listdom-dashboard].
How do I decide which fields should be required?
Make a field required only when the listing becomes genuinely weak without it.
Why does the form look different for different users?
That can happen because of package rules, enabled modules, guest-submission behavior, or other Frontend Dashboard settings.
Should I enable every available field and module?
Usually no. Start with the fields that clearly improve listing quality and user understanding, then expand only when needed.