
The Listdom Booking Addon lets visitors move from discovering a listing to requesting or reserving what it offers. A venue can offer scheduled slots, a rental can offer date ranges, and an organizer can offer event places. The setup works best when the listing’s booking model matches the real service.
Before enabling payment, decide what the visitor is reserving, when availability should be blocked, and who approves the request. Those decisions are separate. A booking can be approved while payment is still due, or paid while waiting for owner review. This guide turns that distinction into a practical setup and test sequence.
Start with one service and one booking setup
Install and activate the Listdom Booking Addon, then choose one representative listing for the first implementation. Open the listing in WordPress administration or a compatible frontend editing form, find its Booking section, and enable booking for that listing.
Choose the setup that reflects the reservation:
| Setup | Useful for | Information to prepare |
|---|---|---|
| Date range | Accommodation or rentals spanning dates | Stay limits, check-in/out expectations, capacity |
| Single date or event | A defined event or occurrence | Event dates, booking cutoff, capacity |
| Time slots | Appointments, classes, or timed services | Available days, duration, buffer, slot capacity |
| Quantity-based booking | Items or inventory reserved by quantity | Total quantity and allowed quantity per booking |
| Simple booking request | A request without structured dates or quantities | Availability notes and clear customer instructions |
Do not choose a date-range model simply because a calendar looks appropriate. A ninety-minute consultation needs different availability rules from a three-night stay. A simple inquiry also should not promise a reserved appointment if the owner still needs to arrange the time.
If you are deciding whether booking belongs in the business model, read the broader directory booking and reservation guide. Here, the goal is configuring and operating an actual workflow.
Configure a real bookable item
In Bookable Items, create one option with a clear name and the fields required by the selected setup. A listing may contain multiple bookable items, but starting with one makes availability and price easier to validate.
For a time-slot service, set the available days, start and end times, slot duration, buffer, and capacity as supported by the setup. For an event, enter the actual event period and capacity. For a rental, review the date range, minimum or maximum stay, and applicable guest limits.
Choose an appropriate supported pricing model. Date ranges can use options such as fixed, per day, per night, and per person where guest capacity is enabled. Event setups can use per ticket; time-slot setups can use per slot; quantity setups can use per item. Free or no-price behavior is also available where supported.
Write the public item description so the buyer can distinguish the options. “Consultation” and “Extended consultation” need meaningful duration or scope information. A pricing unit should be visible enough that a visitor understands why changing dates or quantities changes the total.
When changing an existing listing’s setup, review every bookable item afterward. Switching the model can change the meaning of its fields. Do not assume a migrated or edited configuration remains valid merely because its old values are still present.
Keep approval, payment, and availability separate
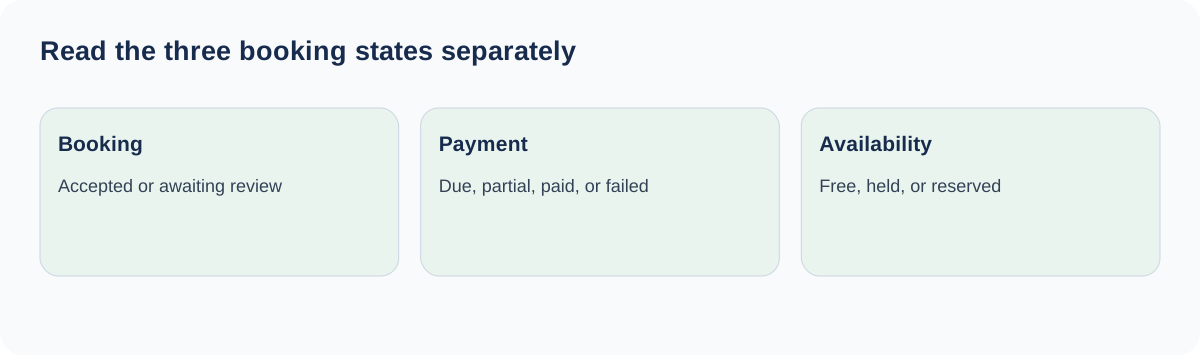
Open Listdom → Settings → Add-ons → Booking and review the lifecycle settings before testing customer requests. There are three related but distinct states:
- Booking status describes approval and the booking lifecycle.
- Payment status describes what is due, paid, failed, or refunded.
- Availability status describes whether inventory is available, temporarily held, or reserved.
For a venue with limited places, this distinction affects both customer expectations and inventory. Accepting a request immediately may be appropriate, while reserving its place before checkout may or may not be appropriate. An owner who reviews every request needs to know what happens to availability during that review.
Build the first test around a written policy: “Customers choose a slot, pay the required amount, and wait for owner review,” or “Eligible bookings are approved after payment.” Then configure the settings to match that sentence. If you cannot explain the policy simply, the visitor will probably find it confusing too.
Choose how requests are approved
Manual approval required keeps a review step. With online payment, a new request can wait for payment and move to pending review after successful payment. Paying does not replace the owner’s approval.
Auto-approve after payment approves a paid or partially paid request after successful checkout. This suits services where the configured availability is sufficiently reliable to accept an eligible paid reservation without a separate review.
Always auto-approve approves immediately even when payment remains due. Use it only when that is the intended policy. An Approved label is not, by itself, proof that money has been collected.
When online payment is disabled, Auto-approve after payment is not applicable and falls back to manual approval behavior. Keep this distinct from Always auto-approve, which approves independently of payment. Test the actual combination rather than assuming every approval mode behaves alike without checkout.
Decide who will monitor pending requests and what response time you can support. The software can represent a review state, but it cannot ensure an owner responds promptly. Clear instructions and a manageable review queue are part of the booking experience.
Set payment amounts and the checkout engine
Choose Full payment, Partial payment, or No online payment according to the offer. Partial payment can require a percentage or fixed amount online, with a remaining amount tracked separately. Make the amount due now and any remaining balance understandable to the customer.
Paid bookings can use the configured Listdom payment engine or the supported WooCommerce checkout path. You do not need to describe WooCommerce as the only option. Set up the chosen engine, gateways, and invoice behavior before sending real customers through checkout.
If different items need different payable rules, review Payable Per Bookable. Consider Auto Order Complete only in the context of how you operate the related order. Keep payment engine configuration separate from the listing’s public price display.
Use a test payment method or the gateway’s supported test environment for the first journey. Verify the selected dates, quantities, payable amount, and remaining amount before checkout and again afterward. The Listdom payments setup guide explains the wider checkout foundation.
For a concrete test, suppose a consultation costs $100 and requires a 30% payment online. The expected amount due now is $30, with $70 remaining. With manual approval, successful payment should still lead to owner review. With auto-approval after payment, that same partial payment can trigger approval. Record the total, paid amount, balance, and approval state separately; a successful $30 checkout does not mean the full service price has been collected.
Decide when to reserve availability
The reservation setting determines how the system protects the chosen dates, slots, or items:
Reserve immediately after booking request blocks availability when the request is created. This protects the request but can tie up inventory before payment.
Reserve only after payment starts without a reservation. After payment, availability handling follows the approval state; a paid request awaiting manual approval can remain held.
Temporarily hold until payment protects inventory during checkout and converts the hold according to payment and approval. Set Hold Duration to a meaningful value in minutes or hours, with a minimum of one. Expired holds release availability automatically.
Choose a hold period long enough for a normal checkout without allowing abandoned requests to occupy inventory indefinitely. The appropriate duration depends on the service and checkout journey; measure your own flow rather than copying a number from another directory.
With no online payment, payment-dependent reservation modes are not applicable and availability is reserved immediately after the request. Recheck the effective behavior whenever you change payment mode.
Walk through the customer journey from a public page
Open the listing as the intended customer. Select the item, dates, quantities, or slot, enter the required contact information, and submit. Check the confirmation message and, if needed, the route to checkout.
Listdom rechecks availability. A slot that was visible when the page loaded may no longer be available when another customer has reserved it. Test a competing request for limited inventory so you understand the rejection or refresh message.
After successful payment, inspect the saved booking, payment, and availability states. Compare them with your written policy. Then test an abandoned checkout and an expired hold. A workflow that handles only the successful path is incomplete.
Where Pay Now is available for an eligible pending Listdom order, test resuming payment from the customer account. Access and availability are checked again. Do not assume an old payment link guarantees the original inventory is still obtainable.
Use readable, accurate listing content throughout. A clear service description, location, and booking unit help both people and discovery tools understand what the directory offers. Avoid promising that an external assistant can complete a booking merely because the public page has a form.
Operate the owner and customer dashboards
In the frontend Bookings area, listing owners use My Listings Bookables to review requests associated with their listings. Customers use My Bookings to review their own reservations. Test both accounts, because their available actions are different.
Owners can inspect the item, customer, dates, amounts, and lifecycle states. Actions appear when permitted and can include approval, rejection, cancellation, releasing availability, changing the Person in Charge, and viewing the related order. If you use Person In Charge, enable it and test assignment to an eligible user.
Customers can review details and amounts, and see applicable actions such as Pay Now, Invoice, Contact Owner, or Request a Refund. Availability depends on account ownership, state, timing, payment data, and configuration; every booking will not expose every action.
Review notifications as part of this operational test. A state change stored correctly but communicated poorly can still leave an owner or customer uncertain. Confirm the intended messages arrive and accurately describe whether the request is waiting for payment, review, or another action.
Add availability search after the booking itself works
Go to Listdom → Search and Filter Builder when visitors need to narrow results by booking availability. Use Available Between for date-range criteria and choose the capacity fields that match the question. Requested adult and child counts are different from stored total capacity or remaining slots.
Supported results skins can display matched bookable items and a Book this option action. That path carries valid item, date, and guest selections toward the listing’s booking form. Test it with a listing that contains more than one bookable item.
One eligible item must satisfy the combined criteria. A cheap item and a separate large-capacity item should not collectively appear to satisfy a request for one cheap, high-capacity option. Also check the shortcode’s saved booking filters, because visitor criteria narrow that existing scope.
The Booking Addon documentation covers the complete settings and field references. Treat search as a second acceptance test after the basic request and payment journey is stable.
Handle cancellation and refunds without confusing the records
Cancellation or rejection can release availability. A customer refund request records their intent; it is not confirmation that a gateway has returned funds. Likewise, an authorized Mark as Refunded action updates booking state and does not replace any required gateway-side process.
Check the booking details, linked order, paid amount, remaining amount, and payment provider record before telling a customer a payment has been refunded. Keep that evidence with the support case and avoid repeating a charge or refund to fix an unclear status.
Before launch, sign off the successful booking, pending review, failed payment, abandoned hold, resumed checkout, cancellation, and owner-management cases relevant to your policy. Those tests turn a collection of settings into a booking service people can rely on.
FAQ
Does the Booking Addon require WooCommerce for every booking?
No. Requests can operate without online payment, and paid flows can use the supported Listdom payment engine or WooCommerce path. Configure the engine you actually intend to use.
Can a booking be approved while payment is still due?
Yes. Always auto-approve can approve independently of payment. Inspect payment status and amounts separately from approval.
Why is a paid booking still Pending review?
Manual approval can retain owner review after payment. Check the approval setting rather than assuming checkout failed.
Do temporary holds last forever?
No. Their configured duration governs release when checkout is not completed. Test an expired hold before launch.
Does requesting a refund return the money automatically?
A request records the customer’s intent. Verify the actual payment provider’s refund process and the linked records before confirming that funds were returned.
Should I add availability search first?
Start with a working bookable listing and a tested request/payment lifecycle. Then add search and verify that it carries valid selections to the booking form.