What a Listdom Shortcode Actually Does
If you compare Listdom documentation and shortcode-related pages, one thing becomes clear: a shortcode is not just a simple embed. It controls the layout, behavior, and browsing experience of a listings page.
A shortcode is the part of Listdom that turns your listing data into a browsable directory page.
A Listdom shortcode is a layout builder for displaying multiple listings together.
In practice, it combines three things:
- Layout: How listings are visually displayed
- Query: Which listings are shown
- Behavior: How pagination, sorting, maps, and user interaction work
It defines things such as:
- Which skin or layout is used
- How listing cards look
- How many listings appear per page
- Sorting behavior
- Pagination
- Map behavior in map-based layouts
A shortcode does not create listings. It only tells Listdom how to show existing listings on a WordPress page.
This is an important distinction:
- A single listing page exists automatically after you publish a listing
- A directory page that shows many listings requires a shortcode
Before You Build Your First Listings Page
Before creating a shortcode, make sure:
- You already have at least a few published listings
- Your basic categories and locations are configured
- Your map settings are configured if you want to use map-based skins
If you create a shortcode before adding listings, the page may display correctly but appear empty.
Where to Find the Shortcode Builder
To create a listings layout, go to:
WordPress Dashboard → Listdom → Shortcodes
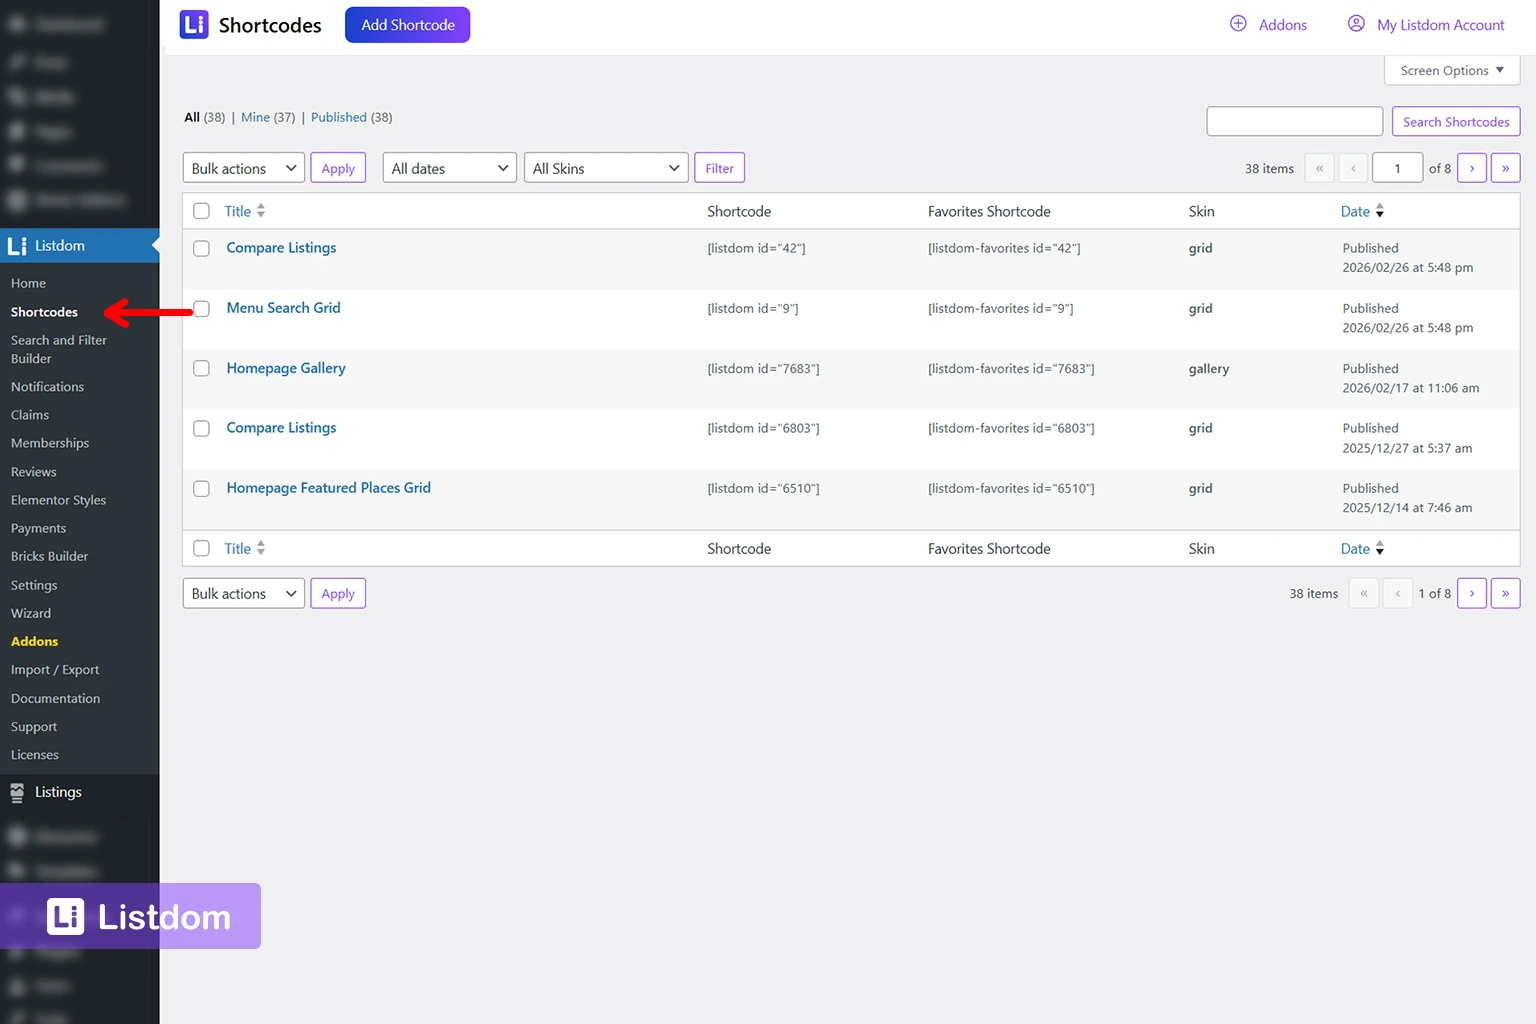
This opens the shortcode builder, where you create and manage directory display layouts.
To start:
- Open Listdom → Shortcodes
- Click Add Shortcode
- Enter a title for the shortcode so you can recognize it later
- Configure the shortcode settings from the tabs shown on the left side of the builder
The shortcode settings are organized into these tabs:
- Skin
- Style
- Map
- Layout
- Sort
- Search
- Filter Options
This structure is useful because it separates visual decisions from functional ones. Instead of changing everything at once, you can move through the tabs in a logical order.
A practical beginner workflow is:
- Choose the Skin
- Adjust the Style
- Configure Layout and Sort
- Use the Map only if your skin includes a map
- Enable Search if you already have a search form
- Use Filter Options if you want the shortcode to show only specific listings
Once published, the shortcode can be copied from the right sidebar and inserted into any WordPress page. Remember that some of the options depend on the skin selected. Also, some features are added and unlocked by Listdom addons. You can read more about them in the Listdom documentation: https://docs.webilia.com/listdom.
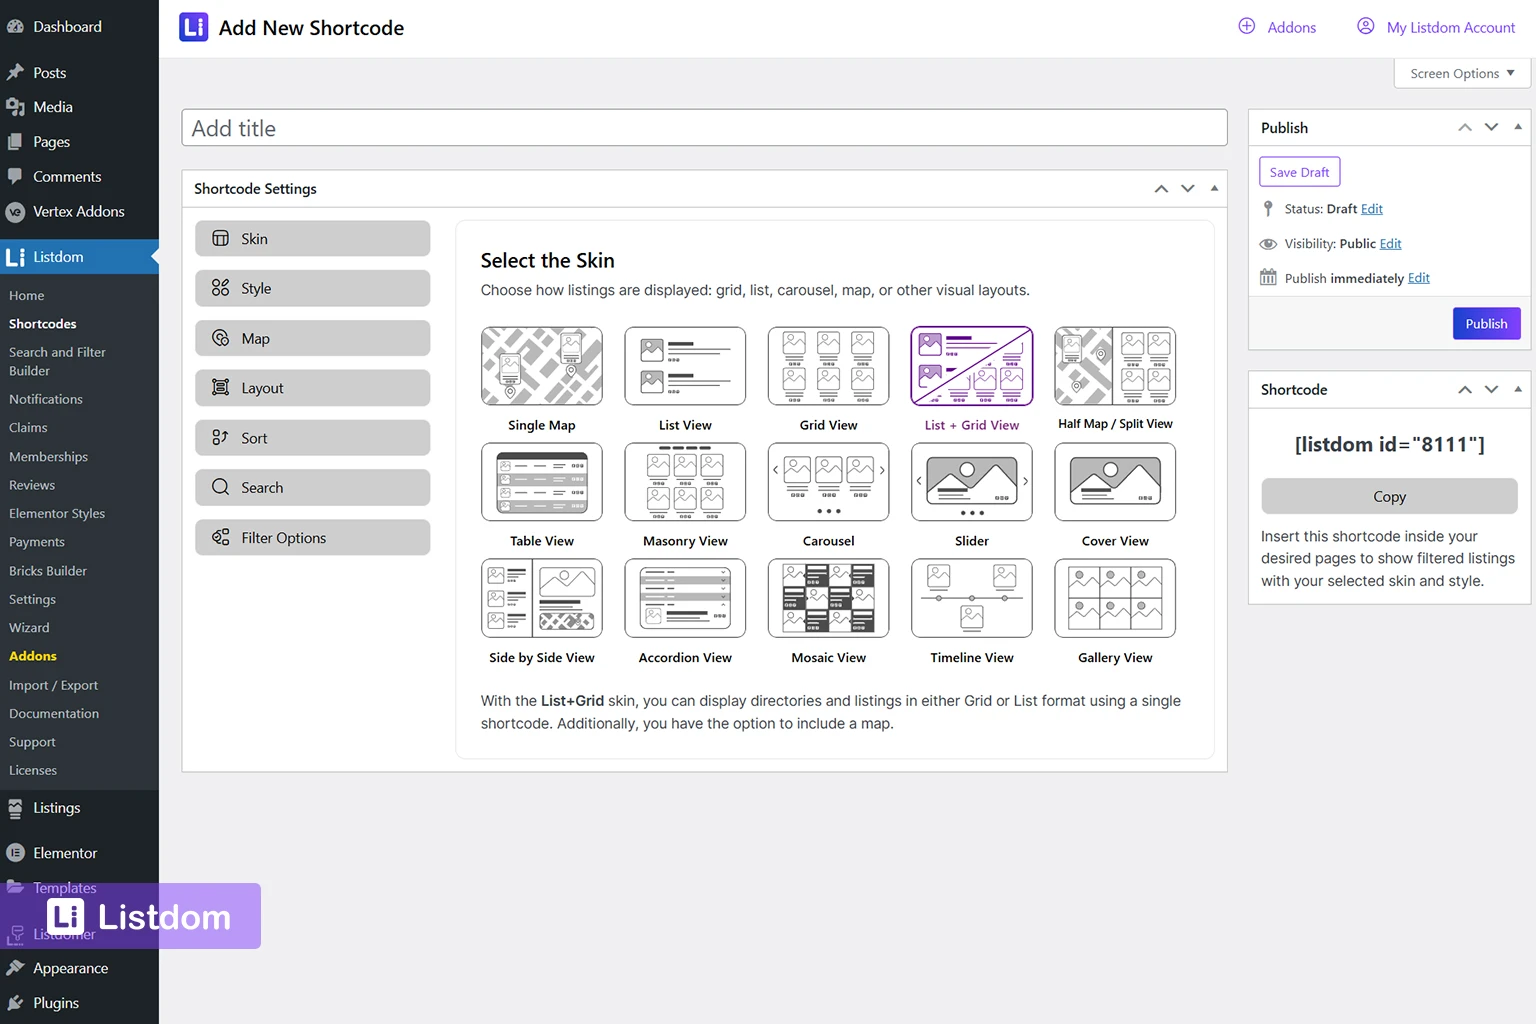
Choosing a Skin for Your Listings
One of the first decisions inside the shortcode builder is choosing a skin. In Listdom, a skin is the visual structure used to render your listings.
The Skin tab is where you choose how the directory page will look. In your current interface, available skins include:
- Single Map
- List View
- Grid View
- List + Grid View
- Half Map / Split View
- Table View
- Masonry View
- Carousel
- Slider
- Cover View
- Side by Side View
- Accordion View
- Mosaic View
- Timeline View
- Gallery View
For most beginners, the best starting point is one of these:
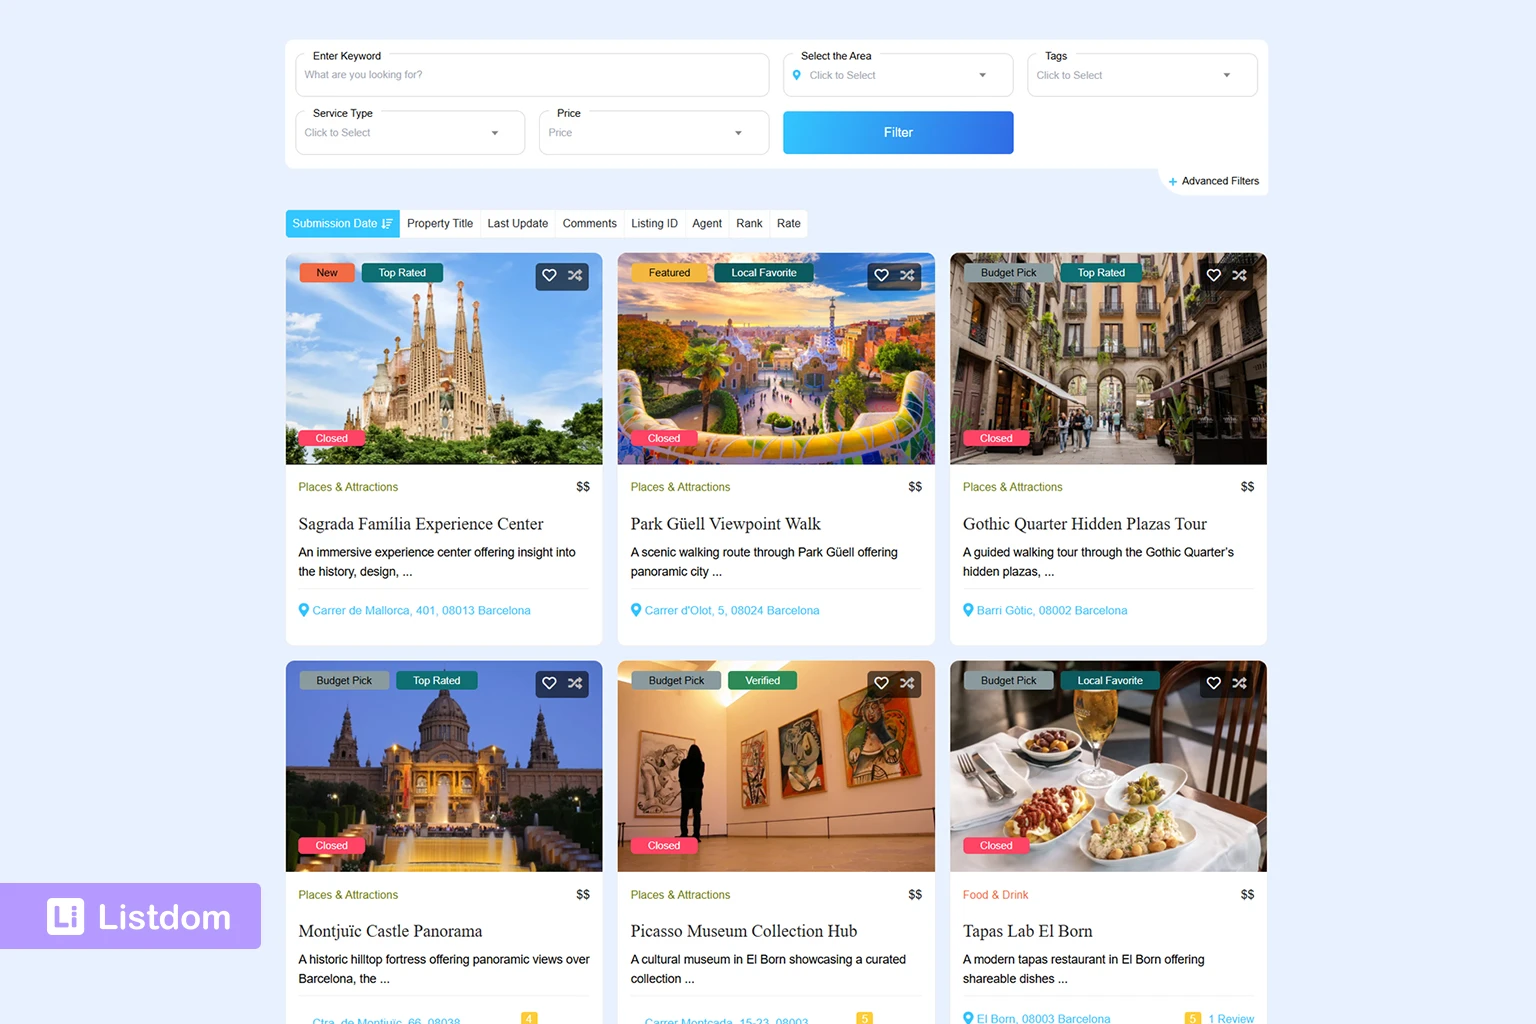
Grid View
Grid view is one of the most common choices. It displays listings as cards in a multi-column layout and works well for business directories, real estate listings, and service directories.
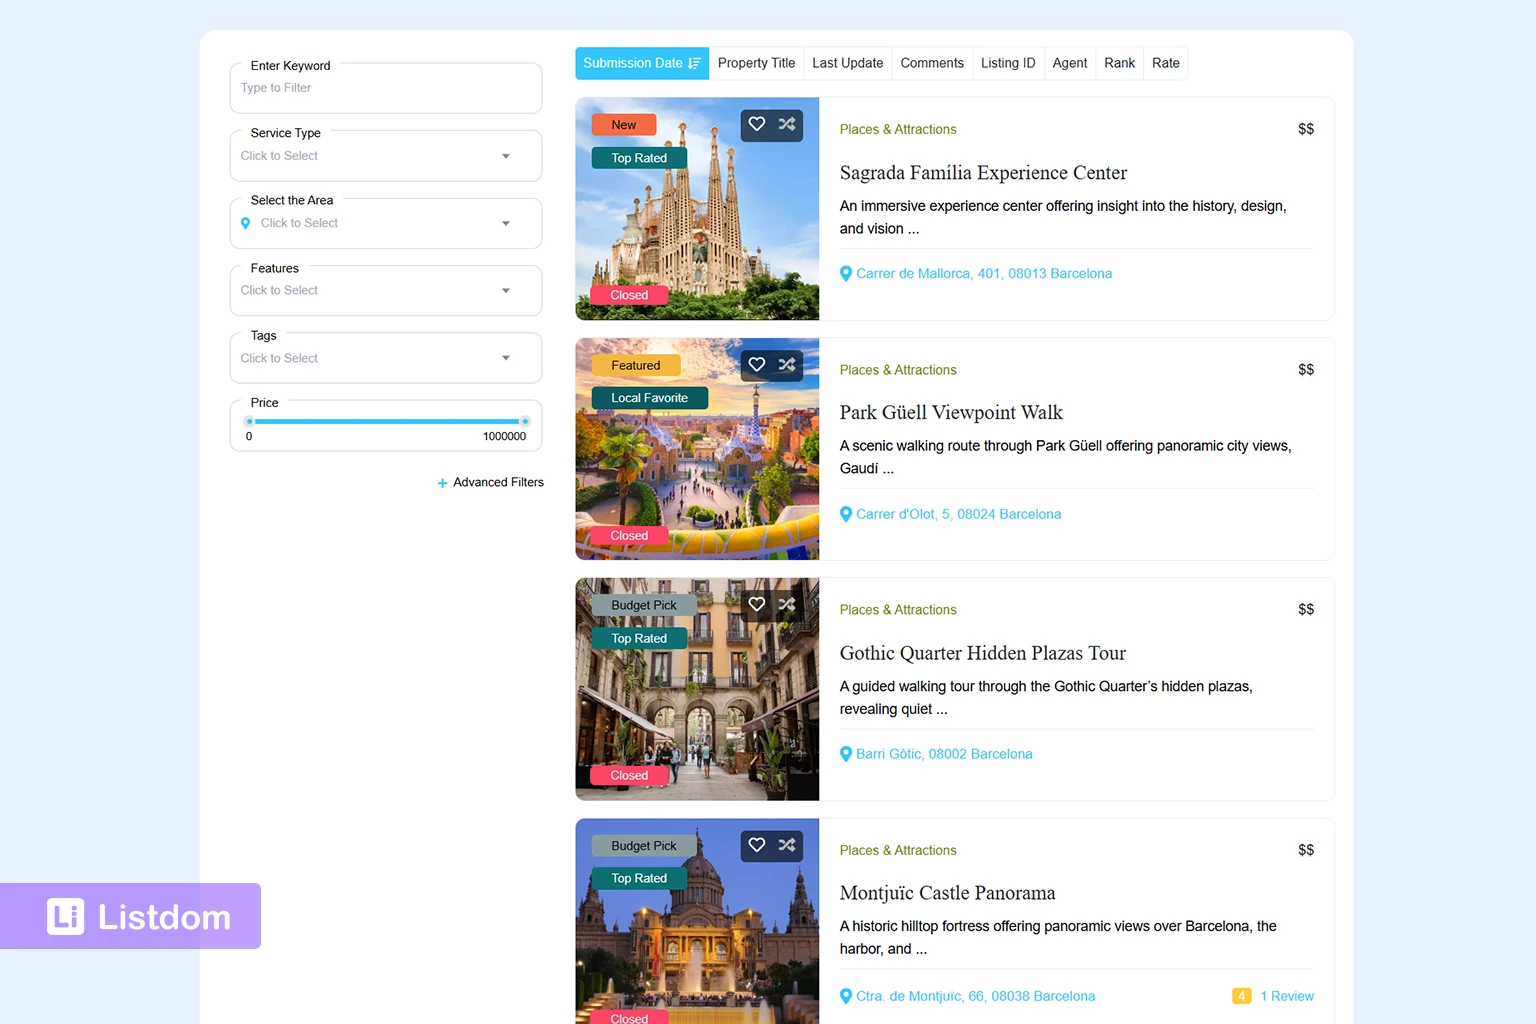
List View
List view displays listings in a more compact vertical layout. It is useful when you want to show more information in a text-oriented structure.
Half Map / Split View
Half Map creates a split-screen layout where listings appear on one side and a map appears on the other. This is useful for location-heavy directories where users want to browse geographically.
List + Grid View
This is a useful mixed layout when you want visitors to switch between list-style and grid-style browsing inside a single shortcode.
Table, Carousel, Slider, and Other Skins
Listdom supports a wider range of skins than most directory plugins. These are useful for specific layout needs, but for most sites, the right approach is to start with one practical layout and add more specialized views later.
Which Skin Should You Start With?
Choose the skin based on how you want visitors to browse your directory, not just on visual preference.
For example:
- Use Grid for visually rich business or property directories
- Use List when users need to scan text details quickly
- Use Half Map when location is central to the browsing experience
- Use Table for more data-heavy or structured directories
- Use List + Grid when you want more browsing flexibility on one page
Configuring the Shortcode
After choosing the skin, the next step is configuring how the shortcode behaves on the page.
This is where the left-side tabs become useful. Each tab controls a different aspect of the final listings page.
Style Tab

The Style tab controls how the selected skin looks. This includes options such as:
- Style variation selection
- Image display method
- Image fit
- Call to action button settings
- Visibility of card elements such as contact info, address, price, labels, title, share buttons, review rates, favorite icon, compare icon, and claim status
This means the Style tab is not just about colors or cosmetics. It controls what information is visible on each listing card.
Layout Tab
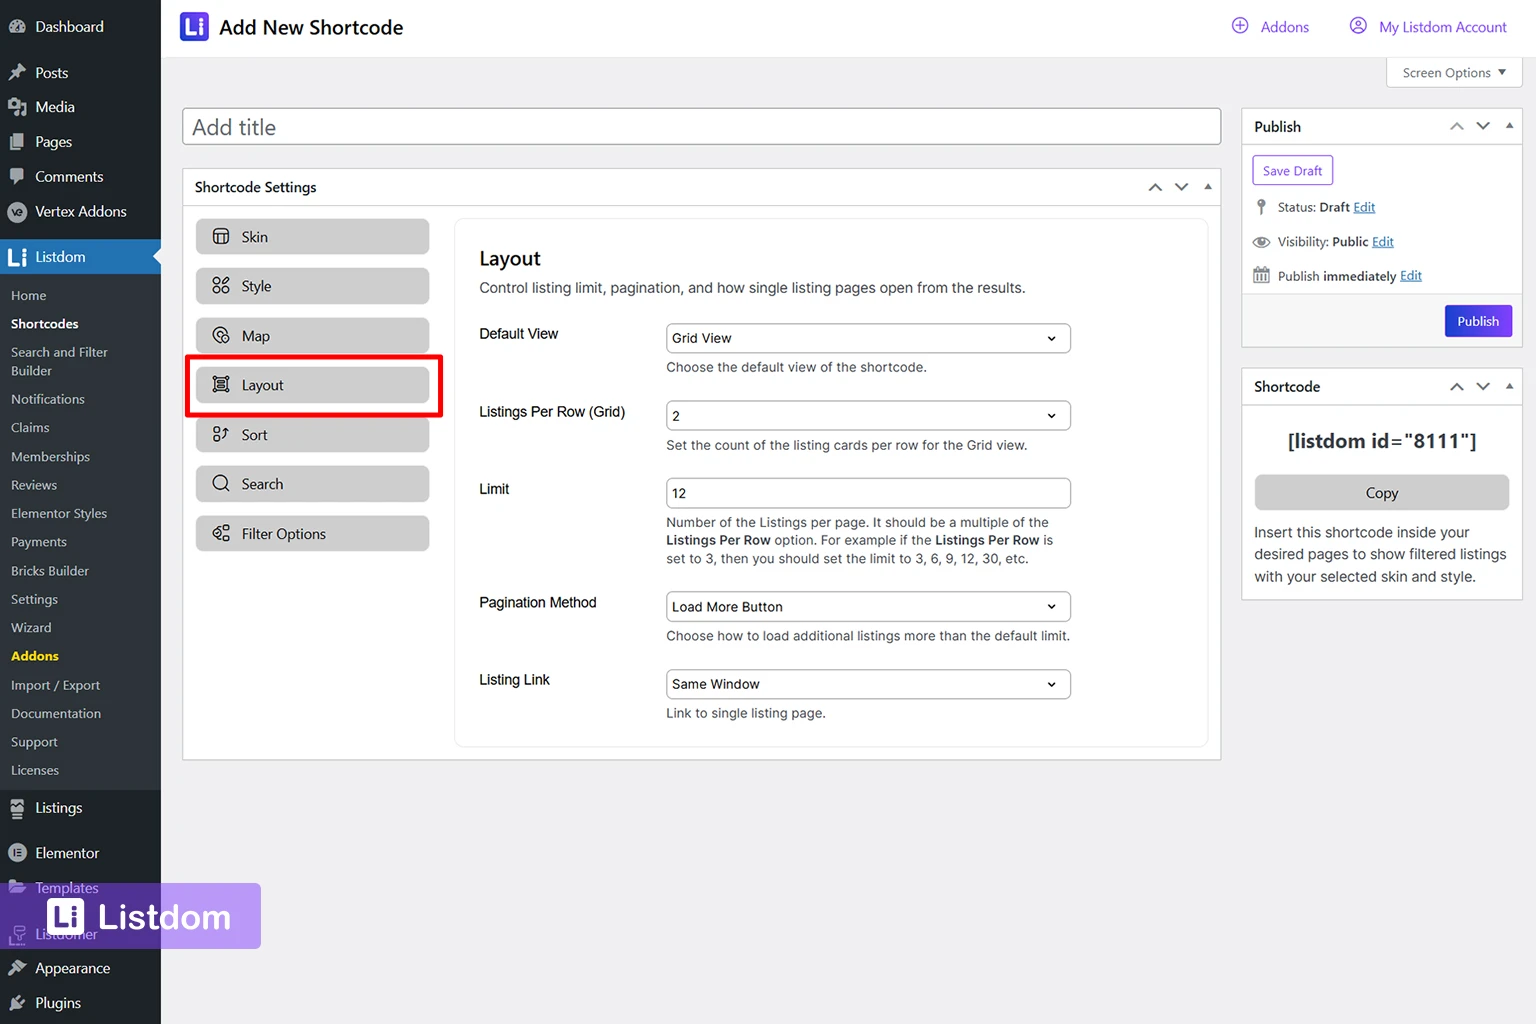
The Layout tab controls the page structure and browsing behavior. The available options depend on the skin selected, it may include:
- Default View
- Listings Per Row
- Limit
- Pagination Method
- Listing Link behavior
This tab is especially important because it controls how many listings appear and how visitors move through them.
For example:
- Limit controls how many listings appear initially
- Pagination Method can use options such as Load More Button
- Listing Link controls whether single listing pages open in the same window or another behavior supported by the interface
Sort Tab
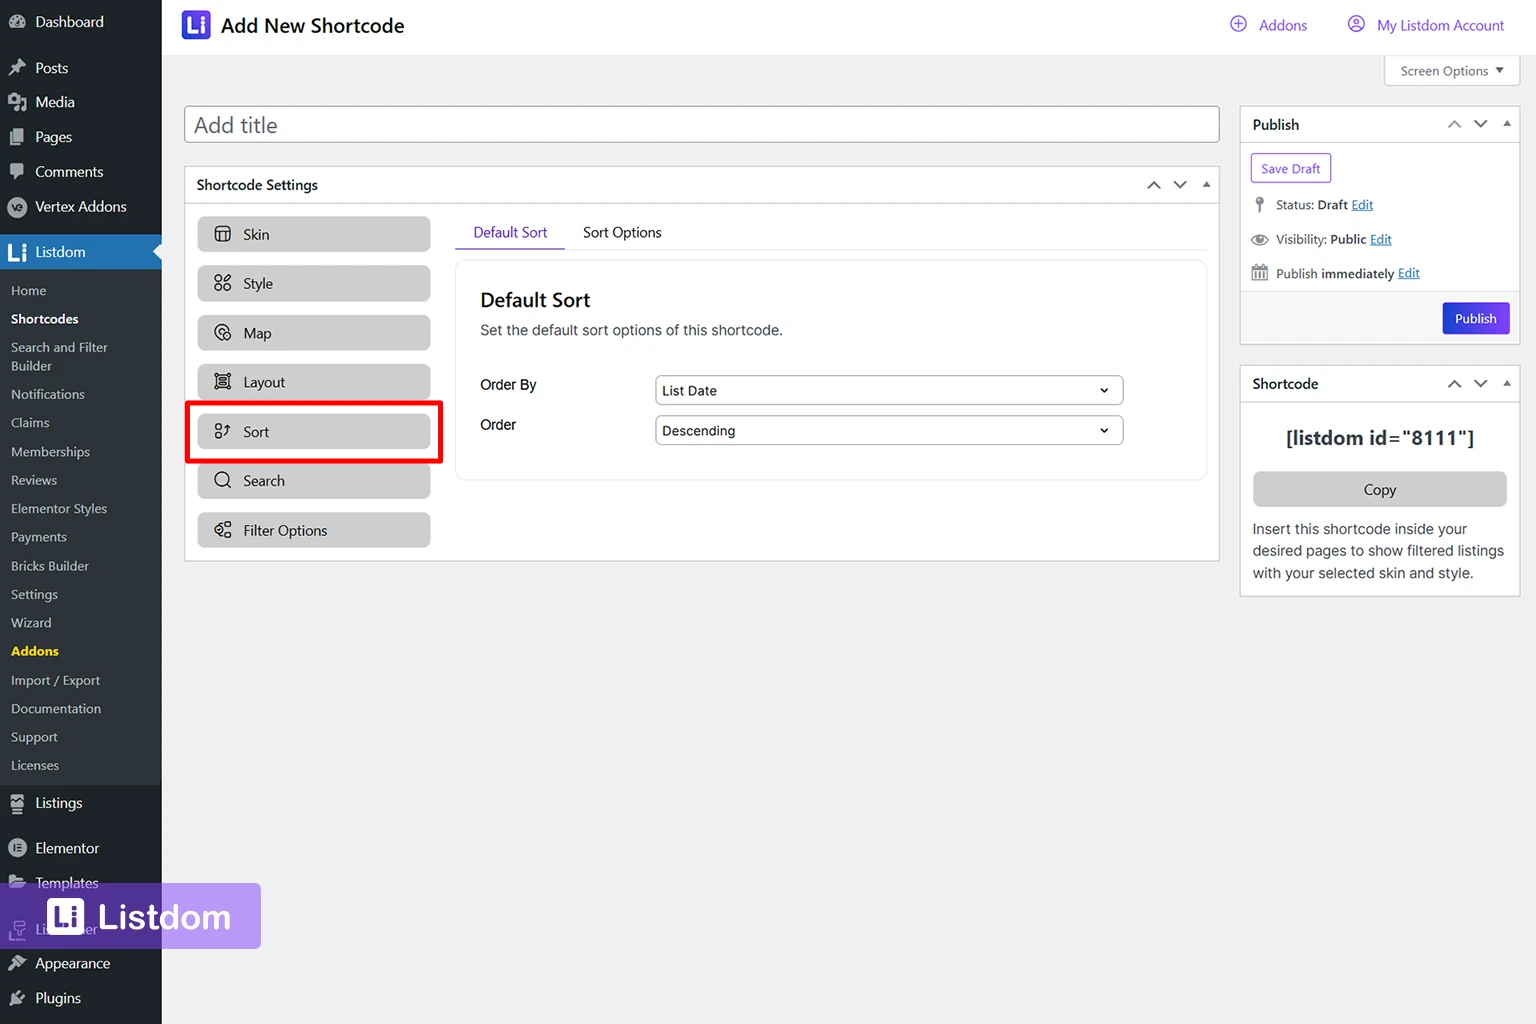
The Sort tab controls listing order. It includes:
- Default Sort
- Sort Options
The default sort lets you choose a base order, such as:
- List Date
- Order direction like Descending
The Sort Options section can expose multiple sorting choices to visitors, including fields such as list date, listing title, last update, comments, author, rank, rate, and more, depending on your setup and active addons. Also, the listings’ custom fields appear in this list too.
This is useful if you want users to reorder the directory on the frontend.
Search Tab
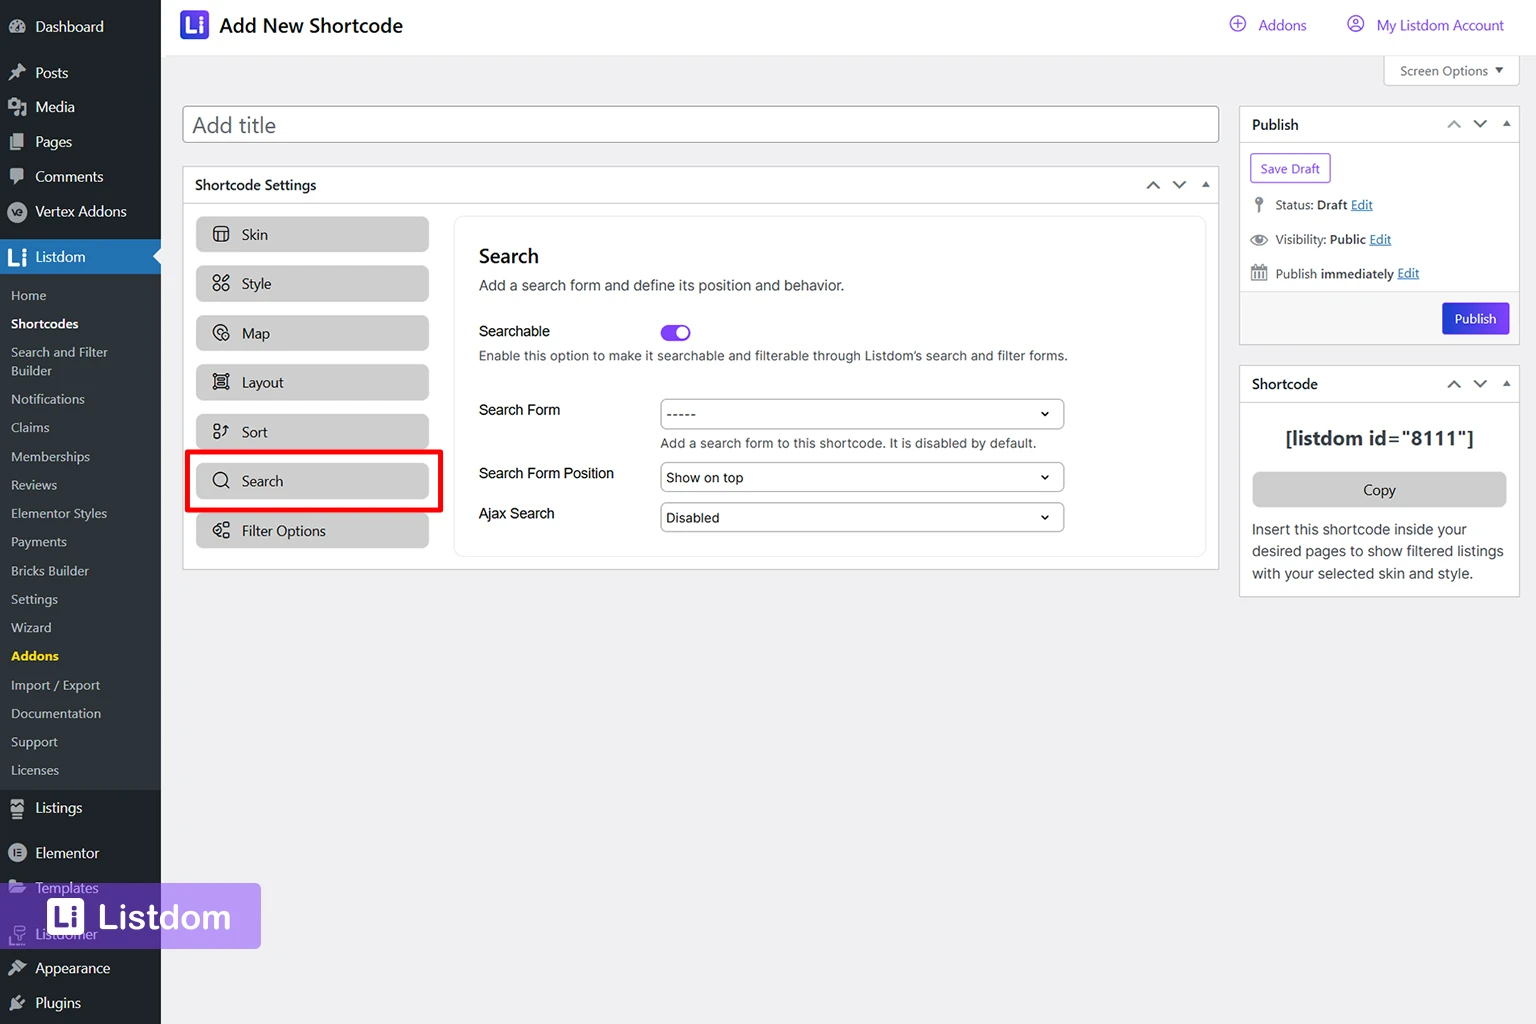
The Search tab connects a shortcode to a search form. This tab includes:
- Searchable toggle
- Search Form selector
- Search Form Position
- Ajax Search option
This means you can attach a search form directly to the shortcode layout instead of placing it manually somewhere else.
Filter Options Tab
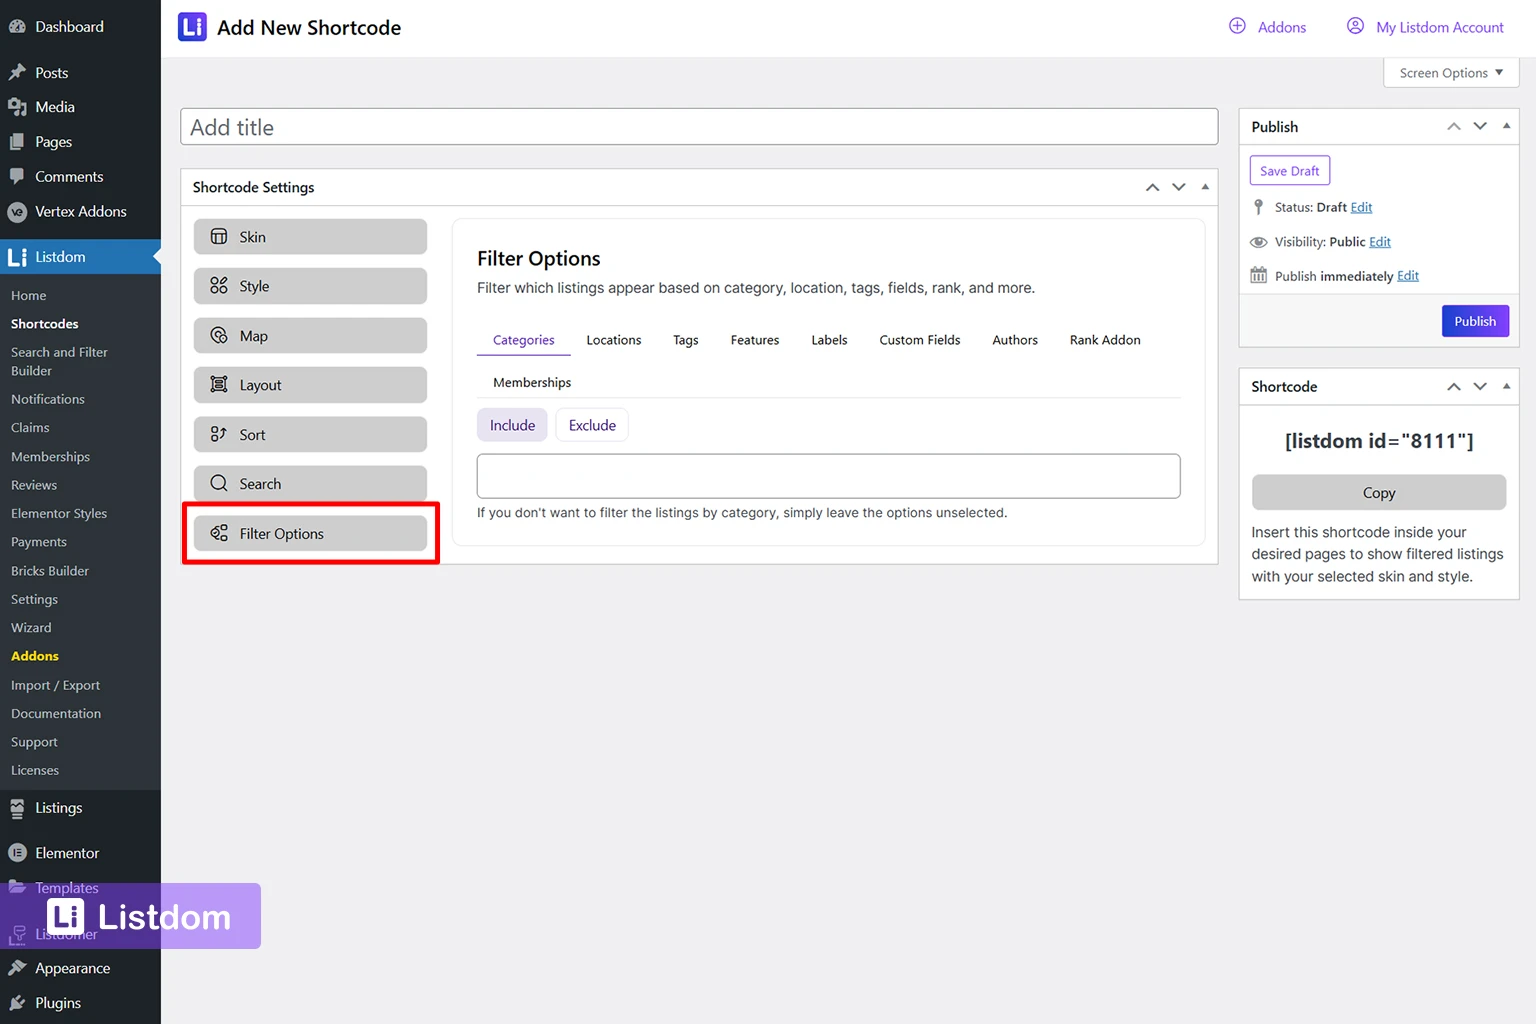
The Filter Options tab controls which listings are included or excluded from the shortcode. This includes filtering by:
- Categories
- Locations
- Tags
- Features
- Labels
- Custom Fields
- Authors
- Rank Addon
This is very useful when you want to create specialized pages, such as:
- a directory page for one category
- a page for one city
- a page that only shows featured listings
Map Tab
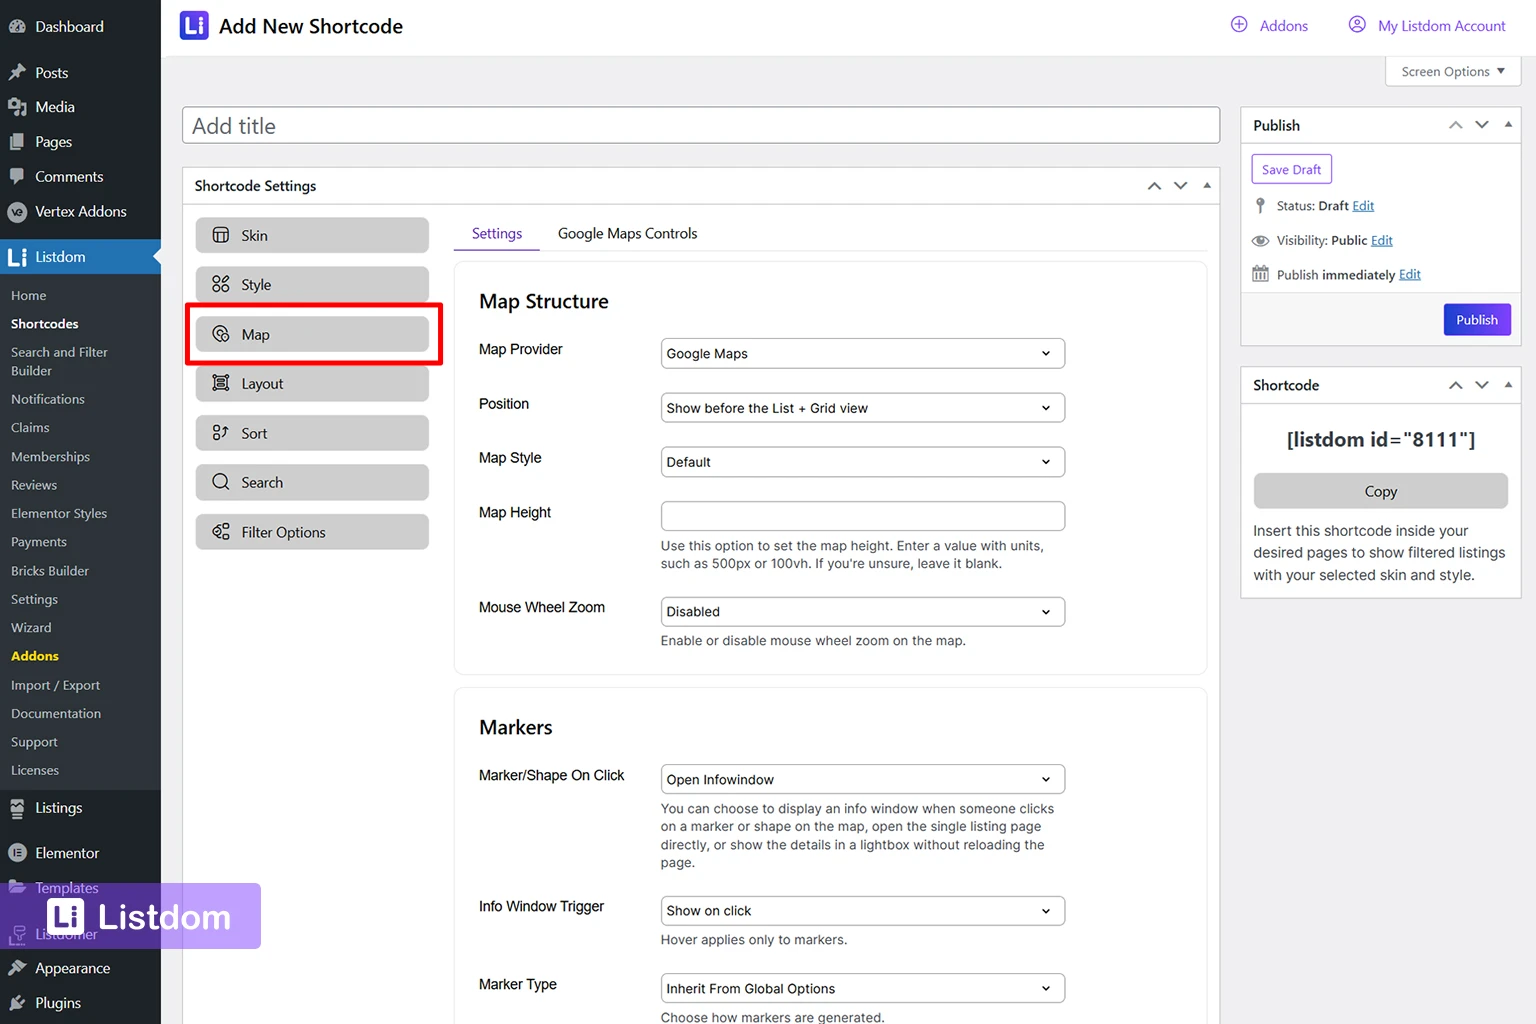
If your selected skin uses a map, the Map tab becomes important. This tab includes sections such as:
- Map Structure
- Markers
- Clustering
- Search & Location
- Restrictions & Rules
This lets you control map provider, position, marker behavior, clustering, auto GPS, map search, and map limits.
For beginners, the easiest path is to leave advanced map settings at their defaults until the layout is working.
Adding the Shortcode to a WordPress Page
Once your shortcode is ready, you need to place it on a normal WordPress page so visitors can access it.
Once the shortcode is configured:
- Click Publish
- Copy the generated shortcode
- Create or edit a WordPress page
- Paste the shortcode into a Shortcode block, classic editor area, or page builder widget
For example, you might create a page called:
- All Listings
- Business Directory
- Browse Listings
When that page is published, the listings will appear using the layout defined in the shortcode.
Example: Create an “All Listings” Page
A simple and practical first step is creating a page called All Listings.
The workflow looks like this:
- Create or confirm that you have published listings
- Go to Listdom → Shortcodes
- Create a new shortcode using Grid or List skin
- Configure the listing card style and listings per page
- Publish the shortcode
- Copy the shortcode
- Create a page called All Listings
- Paste the shortcode into the page
- Publish the page
Now your visitors have a public page where they can browse all listings together.
Common Beginner Mistakes
These are the issues that confuse most new users when working with Listdom shortcodes.
- Creating listings but forgetting to create a shortcode page
- Creating a shortcode but never inserting it into a WordPress page
- Expecting a shortcode to control the single listing page
- Choosing Google Maps, but not configuring the API in the settings
- Setting a listings page with too many items and no pagination
- Enabling search in the shortcode without selecting an actual search form
- Using filter options without realizing that they exclude many listings from the page
Understanding the role of shortcodes early prevents most of these issues.
What to Do Next
Once your listings page is live, the next improvement is usually search and filtering.
After displaying your listings on a page, the next useful steps are:
- Create a search and filter form
- Build category-based listing pages
- Customize skins and listing card appearance
- Add map-based views if your directory needs them
For the full setup workflow, refer back to the main onboarding guide: https://listdom.net/blog/listdom-setup-guide/
The most natural next tutorial after this one is learning how to create a search form and connect it to your listings page.
Frequently Asked Questions About Listdom Shortcodes
Do I need a shortcode for a single listing page?
No. Single listings have their own frontend pages automatically after publishing.
Shortcodes are only needed to display multiple listings together.
Can I use Listdom shortcodes with Elementor?
Yes. You can use Listdom shortcodes inside Elementor and other page builders, or inside the WordPress block editor.
Why are only some of my listings showing?
This is one of the most common shortcode issues.
This may happen because of shortcode query settings, pagination configuration, or because some listings do not match the current taxonomy or filter setup.
What is the best skin for a business directory?
For most business directories, Grid and List views are the best starting options because they are easy to scan and flexible.
Can I create multiple shortcode layouts?
Yes. You can create as many shortcodes as you need for different pages, categories, or visual layouts.
Final Thoughts
Listdom shortcodes are the bridge between your listing data and the public pages visitors browse.
Once you understand that listings are created first and shortcodes are used to display them together, building directory pages becomes much easier. Start with a simple Grid or List layout, publish an All Listings page, and expand from there as your directory grows.